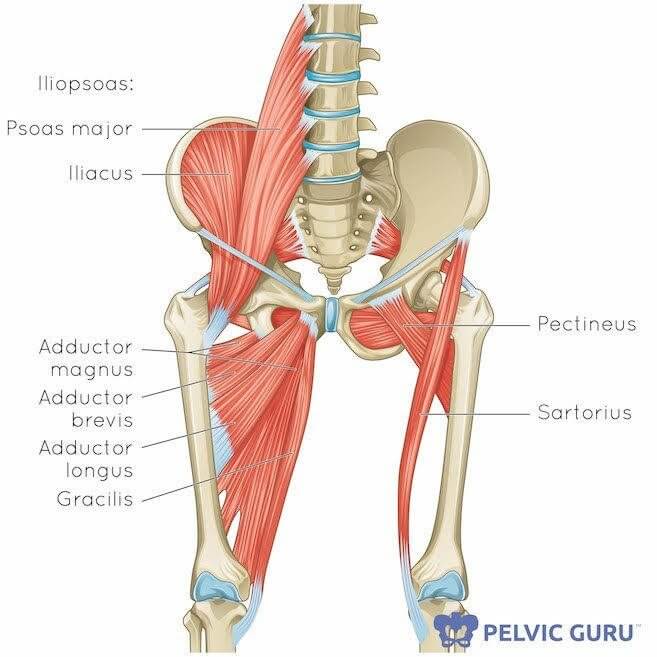
Your hip adductor muscles attach on either side of your knee and run up the inside of your leg to your inner groin area in both of your legs. The hip adductor muscles shown below, are located on both sides of the body.
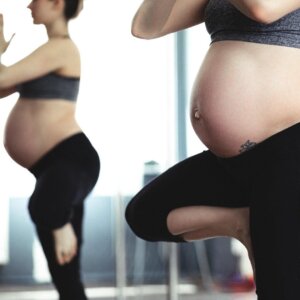
The hip adductor muscles can be the cause of a multitude of problems, such as pelvic, groin, testicular, or hip pain which can be difficult to treat based on your specific mobility limitations. You may struggle to achieve basic squatting or kneeling positions throughout your day, like reaching into a kitchen cabinet or cleaning the bathtub.
BENEFITS OF HIP ADDUCTOR STRETCH:
- Decrease hip, abdomen, and pelvic pain
- Aids with deepening squat
- Helps with delivery
- Allows accessibility to more intimacy positions
- Aids with balance and stability
Hip adductor stretches can be done in a number of ways, and any of the variations mentioned here provides a perfect chance for gaining increased flexibility and range of motion. All of the demonstrated variations can be done on either side of your body. My accompanying YouTube video is a great way to check your form and see a sample of these variations!
Just beginning? Did you try to start 3 months ago and gave up? Feeling overwhelmed? Try some of these variations to find a new starting place for your journey. Hip adductor stretches can be done on either side, by themselves, or within a series of stretches , so let’s try to start reaping those benefits together today! Begin by relaxing deeply, focusing on your diaphragmatic breathing, and find what you need to be supported properly in the guide below.
EXERCISE! Practice your diaphragmatic breathing with this hip adductor stretch 3x daily. Hold for 90 seconds at a time. This hold time is important for your body to transition and downregulate. It may feel uncomfortable at first. Meet your body where it’s at and breathe through it.
VARIATION 1: SUPINE HIP ADDUCTOR STRETCH
OPTION 1
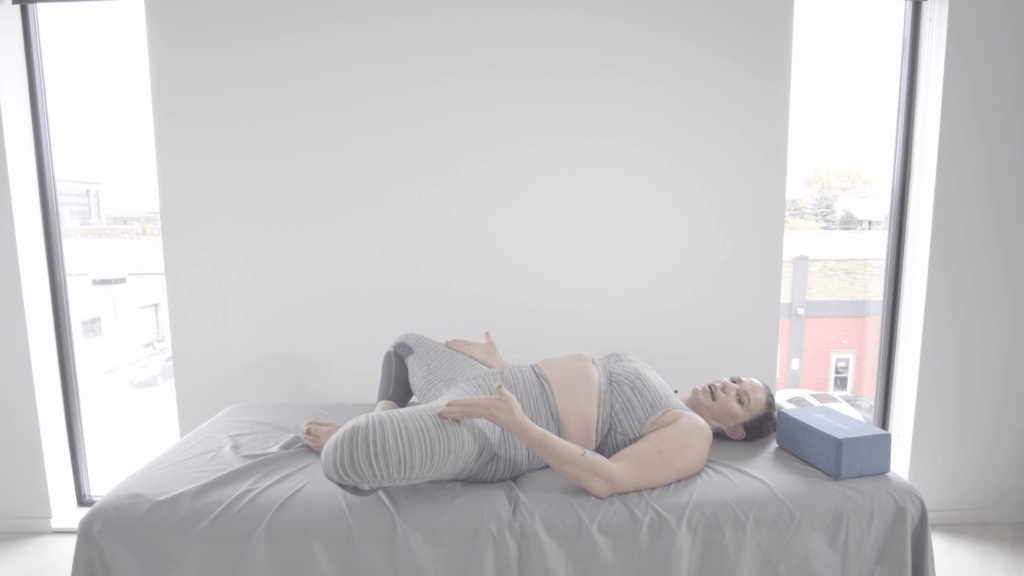
This is the lying down version of the hip adductor stretch. Begin by laying on your back, place your feet together, soles flat on the floor or mat or bed that you are laying on. Then allow your knees to fall out to the sides, opening up the stretch through the inner portion of your thighs.
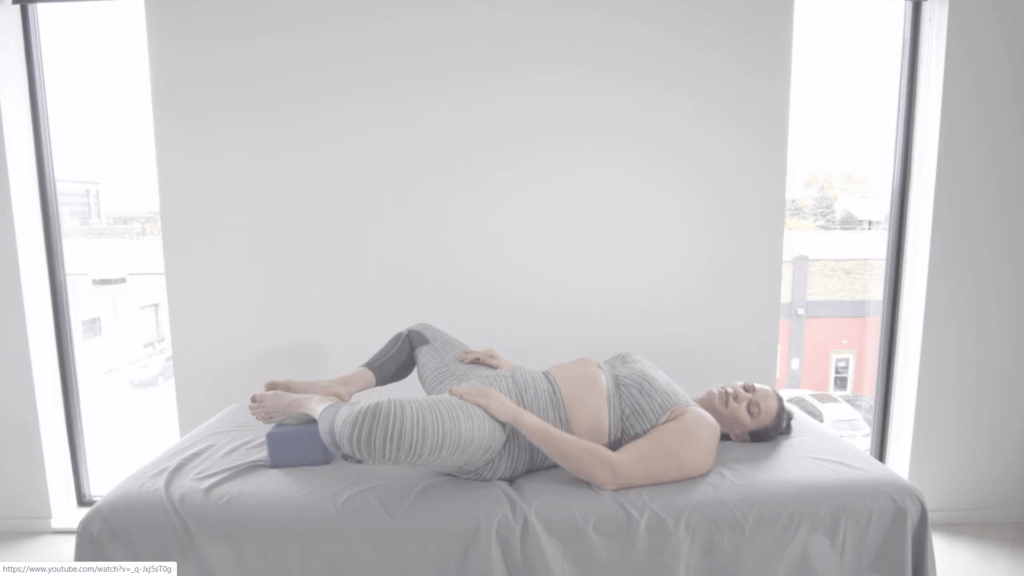
OPTION 2
VARIATION 2: SEATED HIP ADDUCTOR STRETCH
STEP 1
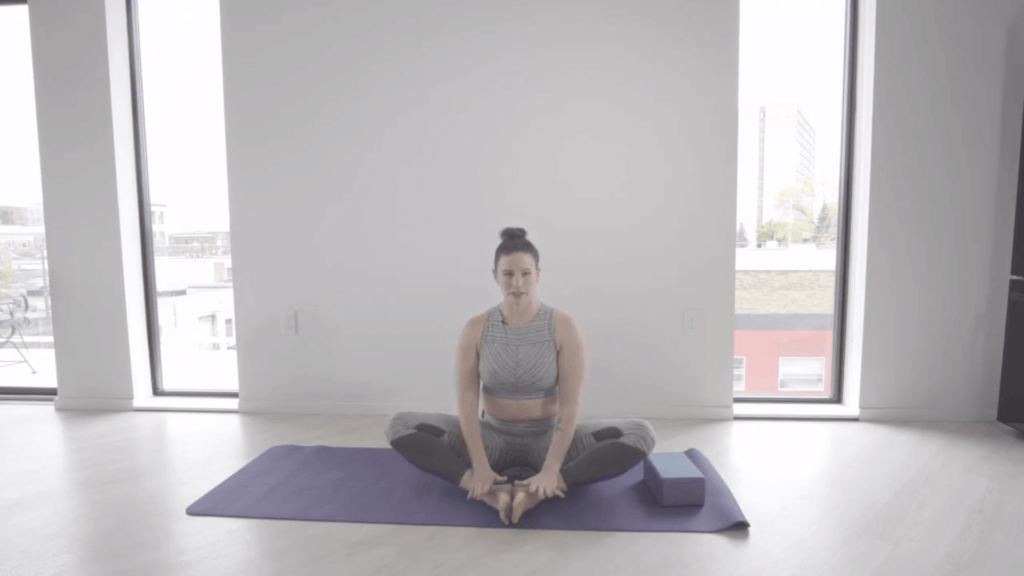
Begin by sitting cross-legged on the carpet, a blanket, or yoga mat. You will want something to provide a bit of support or cushion so you are able to move around in the stretch. Move your feet and place them soles together, and let your knees fall out to the side to feel that stretch through your adductors.
STEP 2
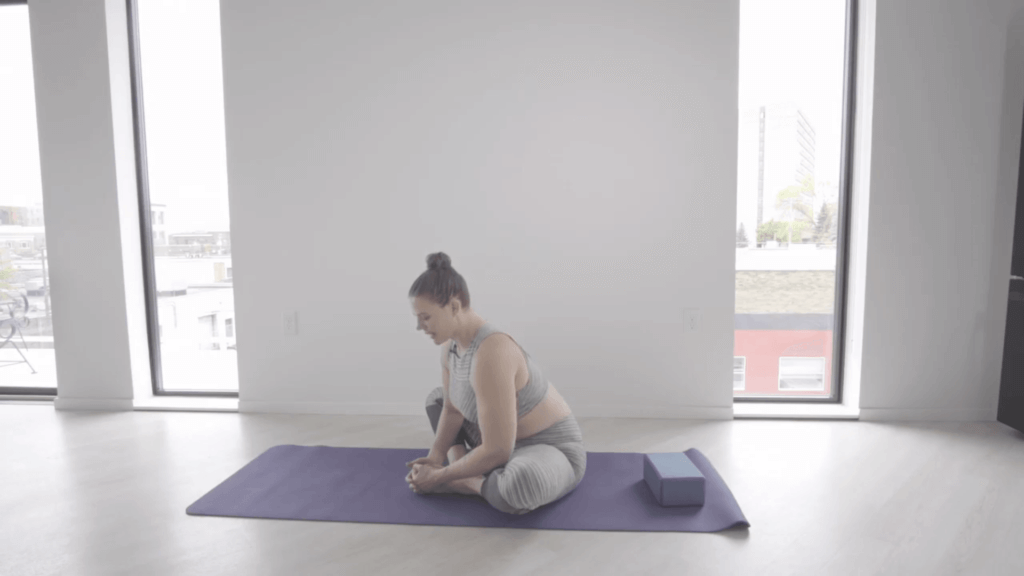
From here you can deepen the stretch through the length of your adductors by leaning forward.
Keep your torso nice and tall, bring your chest forwards and towards the ground. Make sure not to collapse your chest towards the ground, maintain your upright torso while bringing your chest to this position. This should require some gentle pelvic tilting on your part.
Focus your gaze on a spot about 6-12 inches from your feet, and lean in to feel that stretch. Many people place their hands on their feet or ankles here and pull, or you can stretch your arms forward palms down to deepen the stretch even further.
Meet your body where it is today, but if you’re feeling up to reaching, GO FOR IT!
OPTION 1
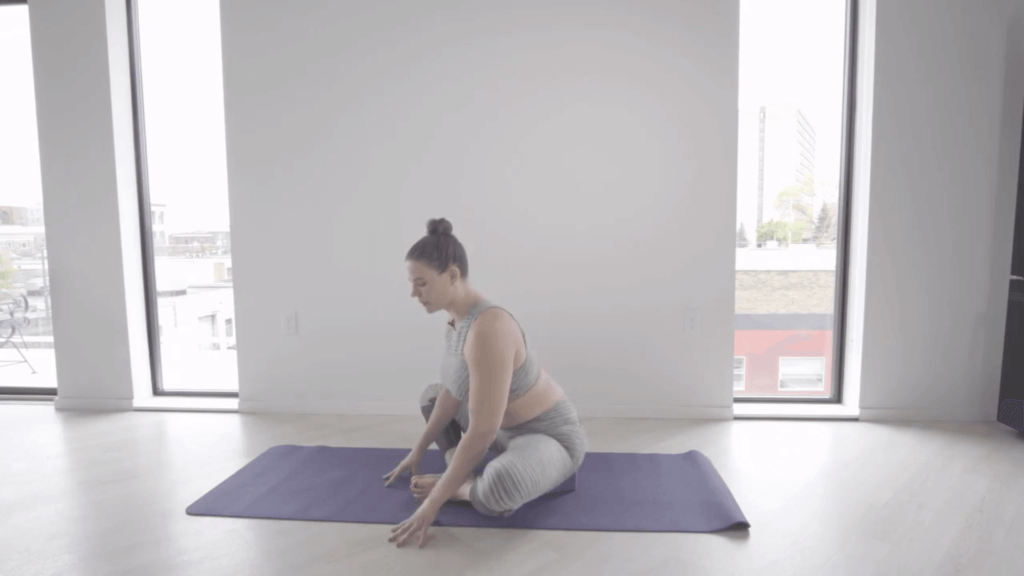
If you struggle to bring your knees down in this position, you can utilize a yoga block to slightly elevate the level of the floor.
Place the yoga block underneath your pelvis and repeat Steps 1 & 2. When you reach Step 2 your arms will help support your pelvic tilt in this stretch and may require a longer reach. From here tilt your pelvic and bend your elbows to allow your chest to drop and deepen the stretch.
But Laura! I can’t reach the ground, this is impossible!!
SHUSH YOU, no it is not, you CAN do this!
Grab a dining room or office chair and place it in front of you. Use the seat as support for your arms, allowing you to lean and deepen the stretch without going alllllll the way to the floor.
OPTION 2
STEP 1
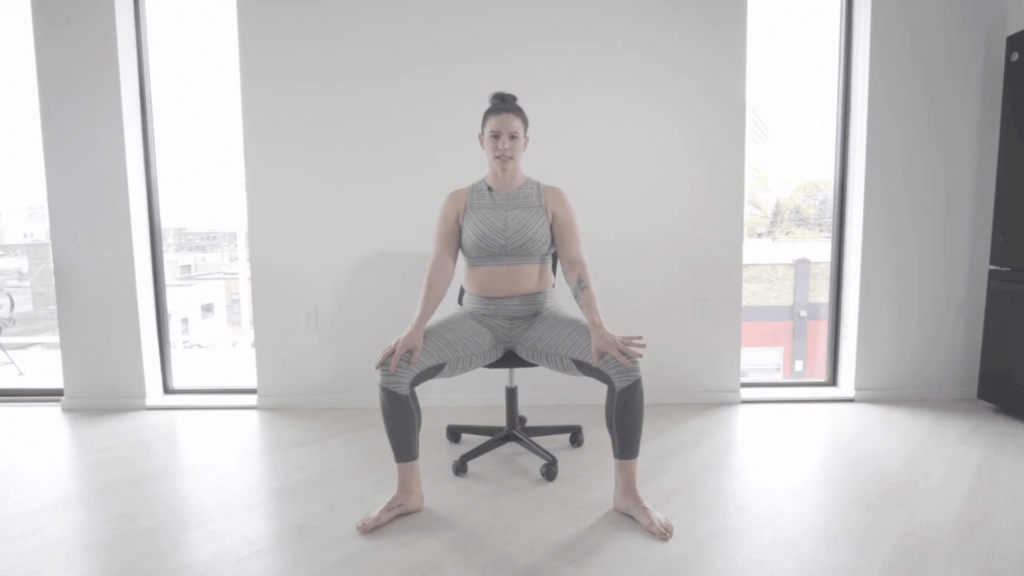
Grab an office or dining chair, this stretch is great for those who sit a lot of their day. Sit with your buttocks resting on the front edge of the seat and separate both knees out to the side into a comfortable stretching position. Keep your ankles below your knees to focus the stretch through your knees and hips.
STEP 2
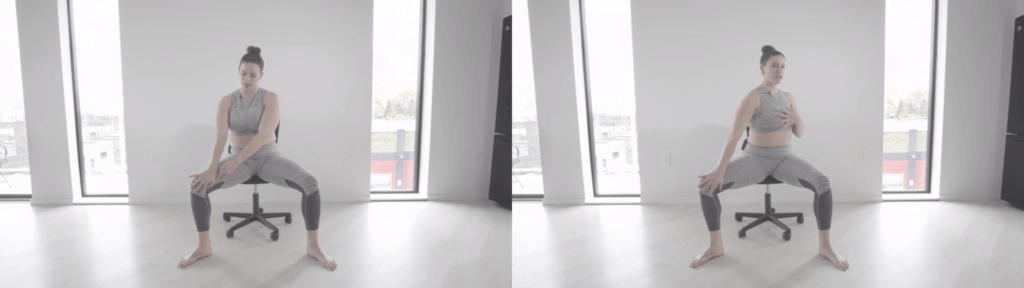
You can perform this stretch on either side of your body. For this example I’m utilizing my right leg.
Block your hand against the inside edge of your knee, or inner thigh, palm flat, pressing against the surface. Then turn your alternate shoulder, my left, away from that knee, twisting your torso (not the chair!) and pressing into your knee to feel the stretch through your adductors.
Make sure that you maintain a nice upright and stretched tall torso throughout, but without craning backwards through your shoulder or neck. You should feel the stretch by straightening your elbow and pushing through that palm.
VARIATION 3: STANDING HIP ADDUCTOR STRETCH
STEP 1
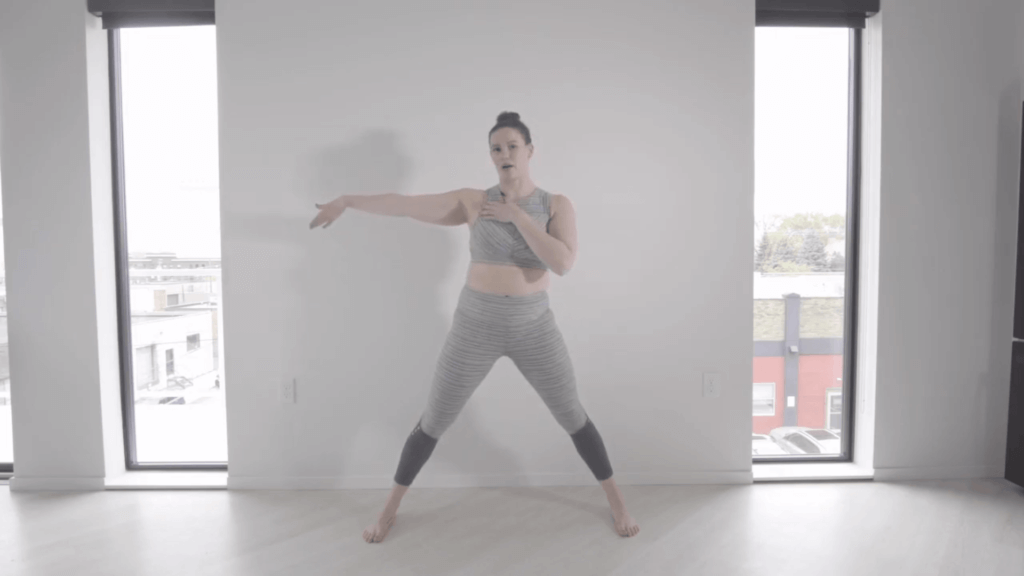
STEP 2

ASK YOURSELF! As you work through these stretch options, check in and ask yourself: Is it a stretch, or is it a pain?
A stretch-like pulling sensation is normal, it may feel uncomfortable, but investigate that feeling. A stretching sensation should gradually reduce with time and allow you to continue to deepen throughout the position.
Pain, alternately, does not change, or may even increase in intensity. If you feel pain, gently ease out of that stretch and try again utilizing a different variation. There are lots of ones to choose from!
PEVLIC YOGA POSES:
PEVLIC FLOOR STRETCHES:
RECOMMENDED PRODUCTS:
I LOVE the yoga store listed below for their quality, and variety of options, designed to meet all of your needs. Manduka is a great one-stop-shop for high-quality yoga products. They also sell clothing and other accessories to make those pelvic stretches possible for everyone.
MORE CONTENT YOU MAY LIKE:
Some of the links on this page may be affiliate links. Laura Meihofer’s LLC is a participant in the Amazon Associates Program and others, as an affiliate advertising program designed to provide a means for sites to earn advertising fees by linking to products Laura organically uses and trusts. If you purchase a product through an affiliate link, your cost will be the same, but Laura will automatically receive a small commission. Your support is greatly appreciated and helps her spread her message!